Winter Forest 3D Shadow Box Papercut SVG Guide
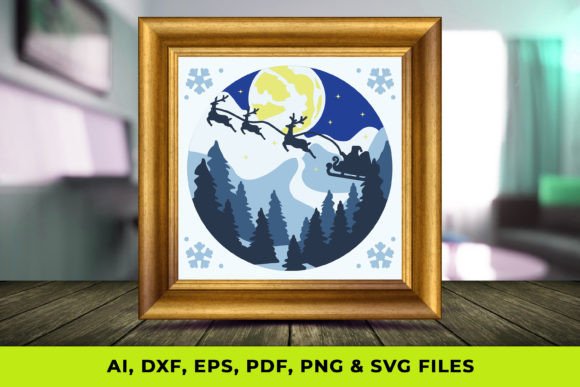
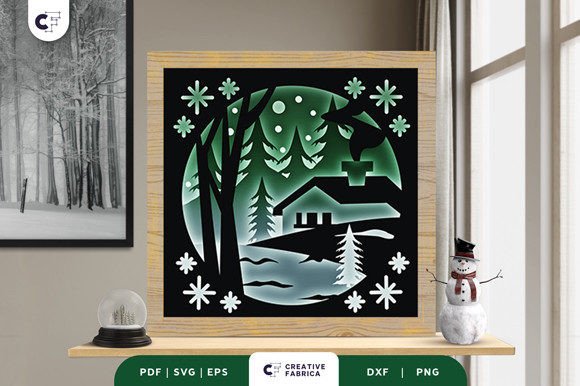
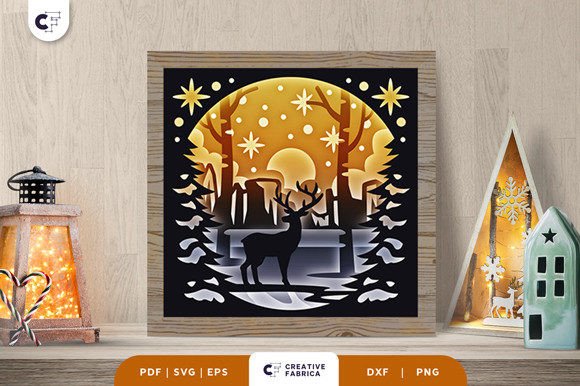
There is a specific kind of quiet magic that happens when winter settles in, transforming familiar landscapes into something ethereal and still. Capturing this atmosphere in a physical medium allows us to hold onto the season's beauty long after the snow has melted. The Winter Forest 3D Shadow Box Papercut SVG offers a tangible way to bring this enchanting scenery into your home or workspace. Unlike flat prints or standard wall art, these layered designs utilize depth, light, and shadow to create a living diorama. When executed correctly, the result is not just a decoration but a window into a nostalgic moment, perhaps featuring a solitary fawn watching a sunset over a frozen village while glowing snowflakes drift through the air.
For creators, designers, and hobbyists, working with these files represents a perfect intersection of digital precision and tactile craftsmanship. The process begins with a digital file but ends with a hand-assembled piece of art that interacts with ambient light in unique ways. Whether you are a small business owner looking to create seasonal inventory, an educator teaching spatial design, or a homeowner seeking a personalized holiday project, understanding the mechanics and creative potential of these shadow boxes is essential.
The Mechanics of Depth and Light
At its core, a 3D shadow box relies on the strategic stacking of multiple layers to simulate distance and perspective. A typical Winter Forest 3D Shadow Box Papercut SVG design, such as the popular fawn motif, often consists of six distinct layers. Each layer is cut from paper or cardstock and spaced apart within a deep frame. The foreground elements, like tree branches or close-up snowflakes, are sharply defined, while background elements, such as the distant village or the setting sun, provide context and color.
The "3D" effect is achieved through the physical space between these layers. When light hits the cutouts, it casts soft shadows on the layer behind it, enhancing the perception of depth. This interplay is what separates a high-quality shadow box from a simple collage. For the creator, this means paying close attention to the spacing materials. Using foam tape, wooden spacers, or folded cardstock strips can alter the intensity of the shadows. Thicker spacing creates dramatic, high-contrast shadows, while thinner spacing results in a softer, more subtle gradient. The goal is to guide the viewer's eye through the scene, from the detailed fawn in the center to the glowing horizon in the back.
Creative Applications Beyond Holiday Decor
While the immediate association with winter themes often points toward holiday decorations, the utility of these designs extends far beyond December. For interior designers and home stagers, a well-lit shadow box serves as a sophisticated focal point that adds texture to a room without overwhelming it. The neutral tones of a winter forest—whites, grays, soft blues, and warm sunset oranges—complement a wide variety of interior styles, from modern minimalist to rustic farmhouse.
Small business owners and Etsy sellers can leverage these files to create customizable gifts. Because the base design is digital, it is easily adaptable. You might swap the central fawn for a family initial, change the background colors to match a client's brand palette, or adjust the size to fit specific frame dimensions. The ability to offer personalization transforms a generic craft item into a bespoke keepsake. Furthermore, these projects are excellent for workshops. Community centers or craft studios can host "build-your-own" events where participants assemble pre-cut layers, making it an accessible activity for various skill levels.
Educators can also find value in these projects. Building a shadow box teaches principles of layering, foreground versus background, and the physics of light. It provides a hands-on method for students to understand how two-dimensional plans translate into three-dimensional structures. For marketing professionals, a custom shadow box featuring a brand's logo integrated into a winter scene can serve as a memorable corporate gift or a unique display piece for trade shows, standing out amidst standard printed banners.
Selecting Materials and Execution Strategies
To ensure the final product looks professional and durable, material selection is critical. The digital files for a Winter Forest 3D Shadow Box Papercut SVG are typically compatible with cutting machines like Cricut, Silhouette, ScanNCut, or even CNC routers for thicker materials. However, the machine is only half the equation. The choice of paper determines the structural integrity and visual appeal of the piece.
- Cardstock Weight: For most shadow boxes, 65lb to 80lb cardstock is ideal. It is stiff enough to hold its shape without warping but thin enough to cut intricate details cleanly. Heavier weights may be necessary for the outermost frame layers to provide stability.
- Paper Texture: While smooth cardstock is standard, experimenting with textured papers can add realism. A linen-textured paper might mimic the look of fabric or heavy snow, while a metallic finish can catch the light to simulate ice or starlight.
- Adhesives: Precision is key when adhering layers. Double-sided foam tape is the industry standard for creating consistent spacing. Liquid glue should be used sparingly and applied with a fine-tip applicator to avoid seepage, which can ruin the clean lines of the cut.
- Framing: The frame must be deep enough to accommodate all layers plus the spacing material. A standard 1-inch deep shadow box frame usually suffices for a six-layer design measuring approximately 20x20 cm. Ensure the glass or acrylic front is clean before sealing the box to trap dust inside.
When assembling, work from the background forward. Secure the rearmost layer (often the sky or sunset) first, ensuring it is perfectly centered. Add spacers to the edges or strategic points behind the next layer before pressing it into place. Check the alignment frequently by viewing the box from the front at eye level. Small misalignments in the early stages can compound, causing the central subject, like the fawn, to appear off-center or tilted.
Adapting Designs for Different Contexts
The versatility of the SVG format allows for significant adaptation. If you are targeting a commercial audience, consider producing these in bulk with standardized color schemes that match current interior design trends. For a more artistic approach, try hand-painting the layers before assembly. Watercolor washes on the background layers can create a dreamy, atmospheric glow that solid-colored paper cannot achieve. Alternatively, use LED strip lights installed within the frame to illuminate the scene from within, turning the shadow box into a night light or a glowing centerpiece.
Digital marketers and content creators can use the assembly process itself as content. Time-lapse videos of the layering process perform well on social media platforms, showcasing the transformation from flat paper to a 3D object. This "behind-the-scenes" look builds value and demonstrates the craftsmanship involved, justifying higher price points for handmade items.
It is also worth noting the file formats available. Receiving the design in SVG, PDF, EPS, PNG, and DXF ensures compatibility across different software and hardware ecosystems. Vector formats like SVG, EPS, and DXF allow for infinite scaling without loss of quality, meaning you can resize the project for a large lobby display or a small desk ornament. Raster formats like PNG are useful for previewing the design or using in digital mockups before committing to physical production.
Maintaining Clarity and Consistency
Whether you are creating one piece for your home or fifty for a holiday market, consistency is vital. Keep your workspace organized, labeling each layer clearly as you cut them. Dust and debris can easily get trapped between layers, so use compressed air or a soft brush to clean each sheet before adhering it. If you are producing multiple units, create a jig or template to ensure spacer placement is identical in every box. This attention to detail separates amateur crafts from professional-grade products.
Ultimately, the Winter Forest 3D Shadow Box Papercut SVG is more than just a file; it is a framework for creativity. It invites you to explore the relationship between light and form, offering a serene escape into a frozen world. By combining precise digital tools with thoughtful manual assembly, you can create evocative scenes that resonate with viewers on an emotional level. Whether capturing the quiet solitude of a fawn in the snow or the bustling warmth of a winter village, these shadow boxes remind us of the beauty found in the stillness of the season.