Mastering the 3D Clownfish Mug Wrap Sublimation for Professional Results
There is something undeniably captivating about a mug that features vibrant, lifelike marine life. The 3D Clownfish Mug Wrap Sublimation design has become a favorite among creators looking to add a splash of color and personality to their product lines. Whether you are a small business owner aiming to expand your ocean-themed collection or a hobbyist crafting gifts for friends, the appeal of a high-quality Clownfish watercolor aesthetic on a curved surface is strong. However, moving from a digital file to a finished physical product involves more than just hitting "print." Many enthusiasts rush into the process without fully understanding the nuances of 3D mug sublimation, leading to avoidable errors in alignment, color vibrancy, and overall finish.
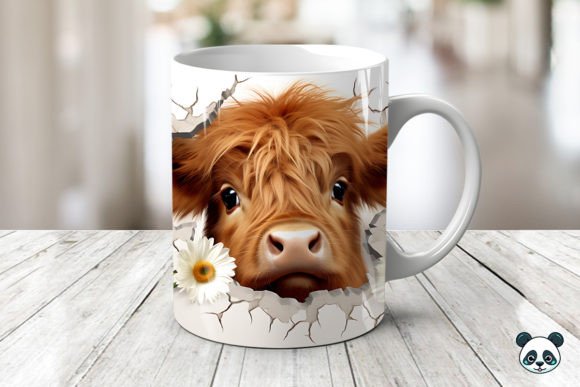
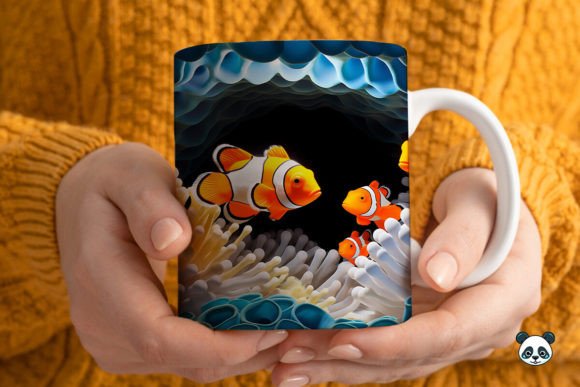
The core attraction of this specific design lies in its 3D Clownfish seamless pattern. Unlike flat graphics, a well-executed 3D design creates an illusion of depth, making the clownfish appear as if they are swimming right off the ceramic surface. This effect is particularly striking on a 20 oz Skinny Mug or a standard 15 oz vessel, where the curvature of the mug enhances the dimensional look. When you purchase an Instant Digital Download PNG, you are acquiring the raw material for this transformation. The file typically includes a Straight Mug Wrap PNG sized specifically for sublimation printers, often around 9.75 inches by 4.75 inches at 300 DPI. While these specifications sound straightforward, misinterpreting them is the first hurdle many face.
Common Pitfalls in File Preparation and Sizing
One of the most frequent misunderstandings occurs regarding the dimensions of the mug wrap template. Users often assume that because a file is labeled for a "20 oz Skinny Mug" or an "11 Oz Mug Template," it will automatically fit their specific blank mug perfectly. In reality, mug manufacturers vary slightly in their dimensions. A generic Clownfish skinny Mug wrap might be too short or too tall for your specific brand of blanks, resulting in white gaps at the top and bottom or overlapping seams that ruin the 3D background continuity.
To avoid this, always measure your actual blank mug before printing. Take a flexible measuring tape and wrap it around the circumference and measure the height of the area you intend to cover. Compare these measurements against the provided Clownfish Mug wrap dimensions. If the downloaded Clownfish png is slightly larger, you can resize it in your editing software, but never scale it up beyond its original resolution, or you risk pixelation. If it is smaller, consider adding a complementary border or adjusting your press settings to center the image effectively. Remember, the goal is a seamless look where the Clownfish seamless pattern flows uninterrupted around the cylinder.
Misconceptions About 3D Effects and Color Management
Another area where creators often stumble is the expectation of the "3D" effect itself. When browsing for a 3D Mug wrap, some buyers expect the printed mug to have a tactile, raised texture. It is crucial to understand that 3D design in the context of sublimation refers to visual depth created through shading, lighting, and perspective in the artwork, not physical relief. The Clownfish 3D seamless pattern relies on high-contrast shadows and highlights to trick the eye. If your final product looks flat, the issue usually lies in your printer profile or heat press settings, not the design file.
Color management is equally critical. The vibrant oranges and whites of a Clownfish background can easily turn muddy if the printer ink levels are low or if the ICC profile does not match your paper and ink combination. A common mistake is printing directly onto standard copy paper or using low-quality sublimation sheets. For a true 3D background effect to pop, you need high-release sublimation paper that holds the ink on the surface rather than absorbing it deeply. Furthermore, always mirror your image before printing. It sounds simple, but forgetting to flip the Sublimation Designs horizontally is a classic error that results in reversed text or oddly oriented fish once transferred.
Optimizing the Heat Press Process
Even with a perfect Digital Download and a flawless print, the heat press stage can make or break your project. Many beginners treat all mugs the same, applying identical time, temperature, and pressure settings regardless of the mug's coating or shape. However, a 3d mug with a specialized polymer coating may require different parameters than a standard budget blank. Insufficient pressure often leads to ghosting, where the Clownfish wrap appears faint or blurred. Conversely, excessive heat can scorch the design, turning the bright clownfish colors brown.
For best results with a 15 Oz Mug Template or any other size, ensure you are using a silicone wrap or high-temperature tape to secure the paper tightly against the mug. Any air pockets between the paper and the ceramic will prevent the ink from transferring correctly, creating white streaks that disrupt the seamless pattern. When working with skinny mugs, pay extra attention to the edges; the curvature is tighter, and the paper is more likely to lift if not secured firmly. A good practice is to do a test run with a cheaper blank to dial in your specific machine's sweet spot before committing to your premium inventory.
Evaluating Quality Before You Buy
Before downloading any Clownfish Mug wrap file, take a moment to evaluate the source and the preview images. High-quality Sublimation Designs should offer clear previews showing how the pattern aligns at the seam. Look for descriptions that explicitly mention "300 DPI" and "PNG with transparent background" if you plan to layer the design over other elements. Be wary of files that look pixelated in the thumbnail; no amount of editing can fix a low-resolution source image.
Additionally, consider the versatility of the design. A good Clownfish seamless pattern allows you to tile the image or crop it for different mug sizes without losing key visual elements. If the design features a specific focal point, like a large clownfish face, ensure the template positions it correctly on the front of the mug rather than hiding it at the handle or seam. Reading the "What is Included" section carefully is vital. Most listings provide a single ZIP file containing the necessary PNGs. Ensure you have the software capability to open and manipulate these files, as the seller typically does not provide physical items or technical support for your specific hardware setup.
By paying attention to these details—accurate sizing, proper color profiling, precise heat pressing, and careful file selection—you can transform a simple Instant Digital Download into a stunning, professional-grade product. The 3D Clownfish Mug Wrap Sublimation offers a fantastic opportunity to create eye-catching merchandise, but success lies in the execution. Treat each step of the process with care, respect the limitations of your equipment, and always prioritize quality control. With the right approach, your ocean-inspired creations will stand out in any market, delighting customers with their vivid colors and immersive depth.