Mastering Layered Depth: A Practical Guide to Using 3D Wings SVG in Your Creative Workflow
In the evolving landscape of digital crafting and small-batch manufacturing, the transition from flat designs to dimensional art represents a significant leap in perceived value and aesthetic appeal. The 3D Wings SVG file format serves as a critical asset for creators looking to bridge the gap between two-dimensional vector graphics and tangible, layered sculptures. Whether you are a hobbyist refining your paper crafting skills, an entrepreneur launching a cosplay prop line, or a marketer seeking unique visual assets for a campaign, understanding how to integrate this specific design type into your workflow is essential for efficiency and quality control.
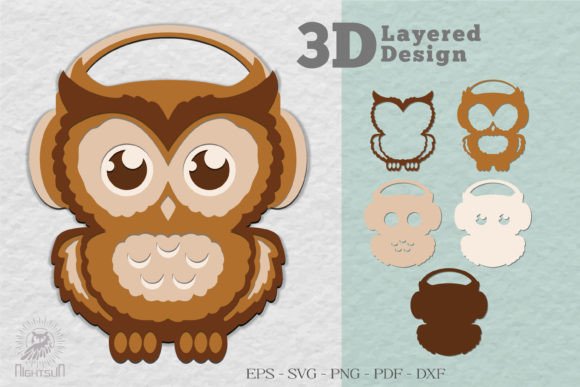
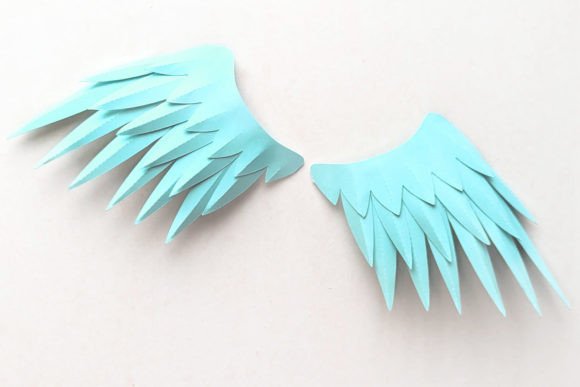
This design allows you to make beautifully layered 3D wings that stand out due to their structural complexity. Unlike standard cut files that result in a single-layer silhouette, this asset is engineered with depth in mind. It offers versatility through optional fold lines on each feather, giving the creator agency over the final texture and rigidity of the piece. This level of customization is vital for professionals who need to adapt a single design for multiple use cases, such as creating delicate angel wings for a wedding decoration versus robust demon wings for a theatrical costume.
Strategic Planning and File Selection
Before initiating any cutting or printing process, the preparation phase determines the success of the final output. When working with a 3D Wings SVG, the first decision involves selecting the appropriate variation of the file based on your material and intended outcome. The design typically comes with two distinct options: wings with fold lines and wings without them.
If your workflow involves thin cardstock or printer paper where manual scoring might tear the material, selecting the version with pre-drawn fold lines is a strategic move. These lines act as guides for your plotting machine to score the paper without cutting through, facilitating clean bends that create the 3D effect. Conversely, if you are using thicker materials like foam board, heavy acetate, or leather, you may opt for the version without fold lines to maintain structural integrity, relying instead on manual shaping or heat forming. This initial choice impacts your entire production timeline, eliminating the need for post-processing adjustments later.
Furthermore, understanding the file formats included in your download is crucial for compatibility with your existing hardware and software ecosystem. The package usually includes:
- SVG: The primary format for Cricut Explore (using Cricut Design Space), Silhouette, Brother, and various other cutting machines. This format retains vector data, allowing for infinite scalability without loss of quality.
- PNG: A non-cuttable image useful for reference, digital mockups, or print-only projects where colors cannot be changed dynamically within the cutting software.
- DXF: Essential for users operating older software versions or specialized machines like Graphtec and AutoCAD systems.
- EPS: Designed for professional vector editing software, allowing deep customization of paths and nodes before sending to a cutter.
Integration into Production Workflows
Once the files are selected, the integration into your physical production workflow begins. For those utilizing desktop plotting machines, the process starts by importing the 3D Wings SVG into your machine's proprietary software. Here, resizing the cutting template is a standard procedure. Because the design is vector-based, you can scale the wings up for a large cosplay backdrop or down for intricate jewelry components without worrying about pixelation. However, it is important to note that scaling affects the assembly; significantly enlarging the design may require heavier materials to prevent sagging, while reducing it too much might make the layering process difficult for human hands.
For entrepreneurs managing inventory, this flexibility allows for a "print-on-demand" model where a single digital asset can fulfill diverse customer orders. You can maintain a library of material types—cardstock, vinyl, heat transfer paper—and switch between them based on the order specifications without needing to source new design files. This consistency in asset management streamlines operations and reduces the cognitive load associated with file organization.
If your workflow does not include a cutting machine, the 3D Wings SVG still holds value through alternative execution methods. By using a standard printer and photo transfer paper, you can convert the design into an iron-on decal. This method is particularly effective for textile applications, such as adding wing motifs to t-shirts or tote bags. Additionally, free software tools like Inkscape or Photopea can be used to rasterize the SVG into a high-resolution poster print. This adaptability ensures that the barrier to entry remains low, allowing freelancers and educators to utilize the design regardless of their equipment budget.
Assembly and Quality Control
The true potential of the 3D Wings SVG is realized during the assembly phase. This is where the concept of "layering" transforms from a digital preview to a physical reality. The instructions included with the design are not merely suggestions; they are a roadmap for structural stability. Proper alignment of layers is critical. Misalignment can lead to an unbalanced appearance or a fragile structure that fails under its own weight.
For paper crafters, some designs can be cut by hand, though this is generally recommended only for prototyping or very small batches due to the time investment and potential for human error. For production runs, relying on the precision of a cutting machine ensures consistency across all units. When assembling, pay close attention to the adhesive application. Using the wrong type of glue can cause warping, especially with thinner papers. A dry adhesive or double-sided tape often yields cleaner results than liquid glues, which can saturate the fibers and distort the fold lines.
Quality control should be an ongoing part of the process. Before committing to a large batch, produce a single prototype. This allows you to test the tension of the folds, the opacity of the layers, and the overall balance of the wings. If the design includes fold lines, verify that your machine's pressure settings are calibrated correctly to score rather than cut. This step prevents wasted materials and ensures that the final product meets professional standards.
Expanding Use Cases and Long-Term Utility
The utility of these designs extends far beyond simple decoration. In the realm of cosplay, these wings serve as lightweight alternatives to traditional foam or wire constructions, offering ease of transport and storage. For educators, they provide a hands-on lesson in geometry, symmetry, and engineering principles, demonstrating how 2D shapes interact to create 3D forms. Marketers can use them as eye-catching props for photography, adding depth and interest to product shots without the need for expensive studio lighting setups.
Long-term use of these assets relies on proper digital organization. Store your 3D Wings SVG files in a structured directory alongside their corresponding instruction manuals and tutorial links. Many packages include a video link in the ZIP folder showing how to assemble the product out of paper. Bookmarking or downloading this video ensures that even if you take a break from crafting for several months, you can quickly refresh your memory on the specific folding techniques required.
Ultimately, the value of this tool lies in its ability to enhance your creative output with minimal friction. By understanding the nuances of file formats, material compatibility, and assembly techniques, you can seamlessly integrate 3D wing designs into your broader creative or business strategy. Whether you are producing a one-off gift or scaling a product line, the precision and versatility of these layered designs offer a reliable foundation for high-quality results.
To maximize your results, always refer to the specific guidelines provided with your download. If you encounter challenges during the assembly, revisiting the tutorial video or consulting community forums dedicated to your specific cutting machine can provide targeted solutions. The journey from a digital file to a physical masterpiece is a process of iteration and refinement, and the 3D Wings SVG is a robust component ready to support that journey.